Set Up Your Server
Get your Orbitr server running in under 10 minutes.
Your own chat server, fully under your control. Let’s get it running.
Orbitr is two desktop apps that work together: the Server App, which runs the server on your machine, and the Orbitr app, the client you and your friends chat in. This guide sets up both. (Everything also works in a browser, but the apps are the smoother path and what we recommend.)
What You’ll Need
- A computer that will act as the server (Windows today; macOS and Linux coming later)
- At least 2 GB of RAM and 1 GB of free disk space
- An internet connection
🤔 What's a self-hosted server?
Instead of using someone else’s servers, you run Orbitr on your own hardware. Your messages, files, and voice calls never leave your network unless you choose to make the server accessible from the internet. If you’d rather skip the setup, Orbitr Pulsar can host a server for you.
⚠️ Is hosting right for your setup?
Making a server reachable from the internet only works, and only makes sense, when you control the network. Use a managed address instead if:
- You're on a network you don't own: public, cafe, hotel, dorm, office, or apartment-building / shared wifi. You can't safely change those routers, and opening them up isn't yours to do.
- You're behind CGNAT or your ISP blocks inbound ports. Direct hosting can't work no matter what you set.
- You'd rather not expose your home's public IP. A successful connection reveals it to whoever connects.
For any of these, let Orbitr Pulsar give your server a free, permanent address with no forwarding and your IP kept private, or route around it with a tunnel or reverse proxy: see Public Access.
Install & Set Up the Server
Launch the Server App and Claim Your Server
ℹ️ About your admin secret
During setup the server also generates an admin secret and stores it in your computer’s OS credential manager, so there’s nothing to write down. You sign in with your identity; the admin secret is a separate break-glass key for emergencies, such as losing access to your identity. Reveal or copy it any time from the Server App under Settings → Admin Secret. See Admin Access & Emergency Recovery.
⚙ What happens on first launch?
Orbitr creates a local database (an embedded PostgreSQL instance managed by the Server App),
generates encryption keys and an admin secret, and
starts listening on port 443 (standard HTTPS) by default. You can change the port later in the
Server App under Settings → Network, or via the PORT environment variable.
Configure Your Server
Name It and Set the Basics
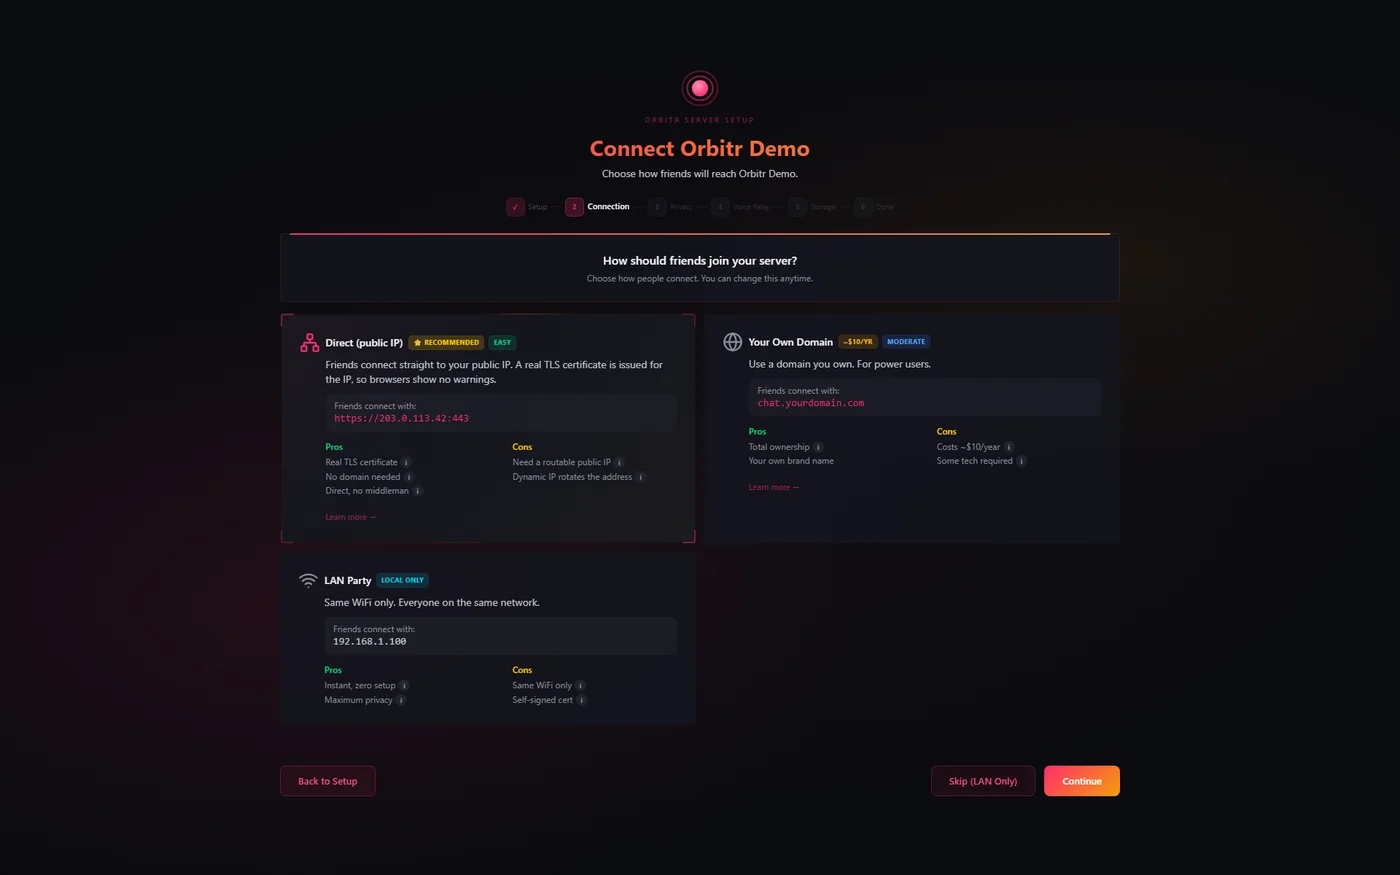
On first launch the setup window walks you through the basics: naming your server, choosing how people reach it (Orbitr can set up connectivity for you), and setting a storage quota. You can revisit all of these, plus who’s allowed to join, anytime in the Server App under Settings:
- Server name: what your friends will see when they connect
- Registration mode: who can join (defaults to approval, where you review each request)
- Storage quota: how much space each user gets (defaults to 10 GB)
Connect with the Orbitr App
Open the Orbitr App and Connect
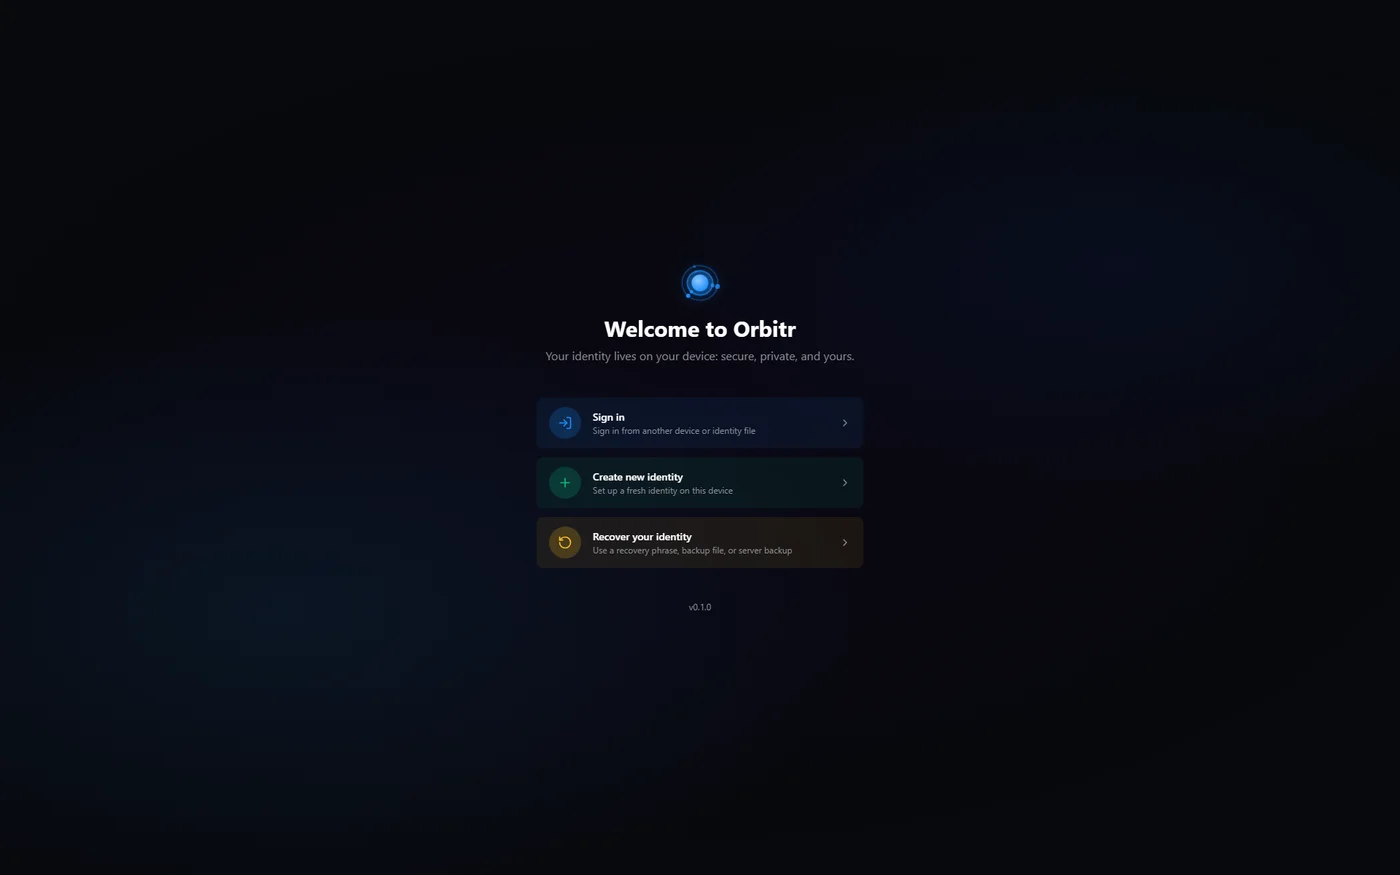
Download the Orbitr app (the client) from the download page. This is separate from the Server App you installed earlier. Open it and sign in with the same identity you used to claim the server.
Because your server is running on the same computer, the app auto-detects it, no URL to type. Just click your server in the list to connect.
ℹ️ Runs on the same PC? It just shows up
The Orbitr app scans for servers running locally and lists them automatically. If you set the server up on a different machine, use Add Server and enter its address instead.
Create a Space & Invite Friends
Create an Orbit on Your Server
A server is the machine; an orbit is a space on it where people actually chat (channels, voice, members). You can host as many orbits as you like on one server.
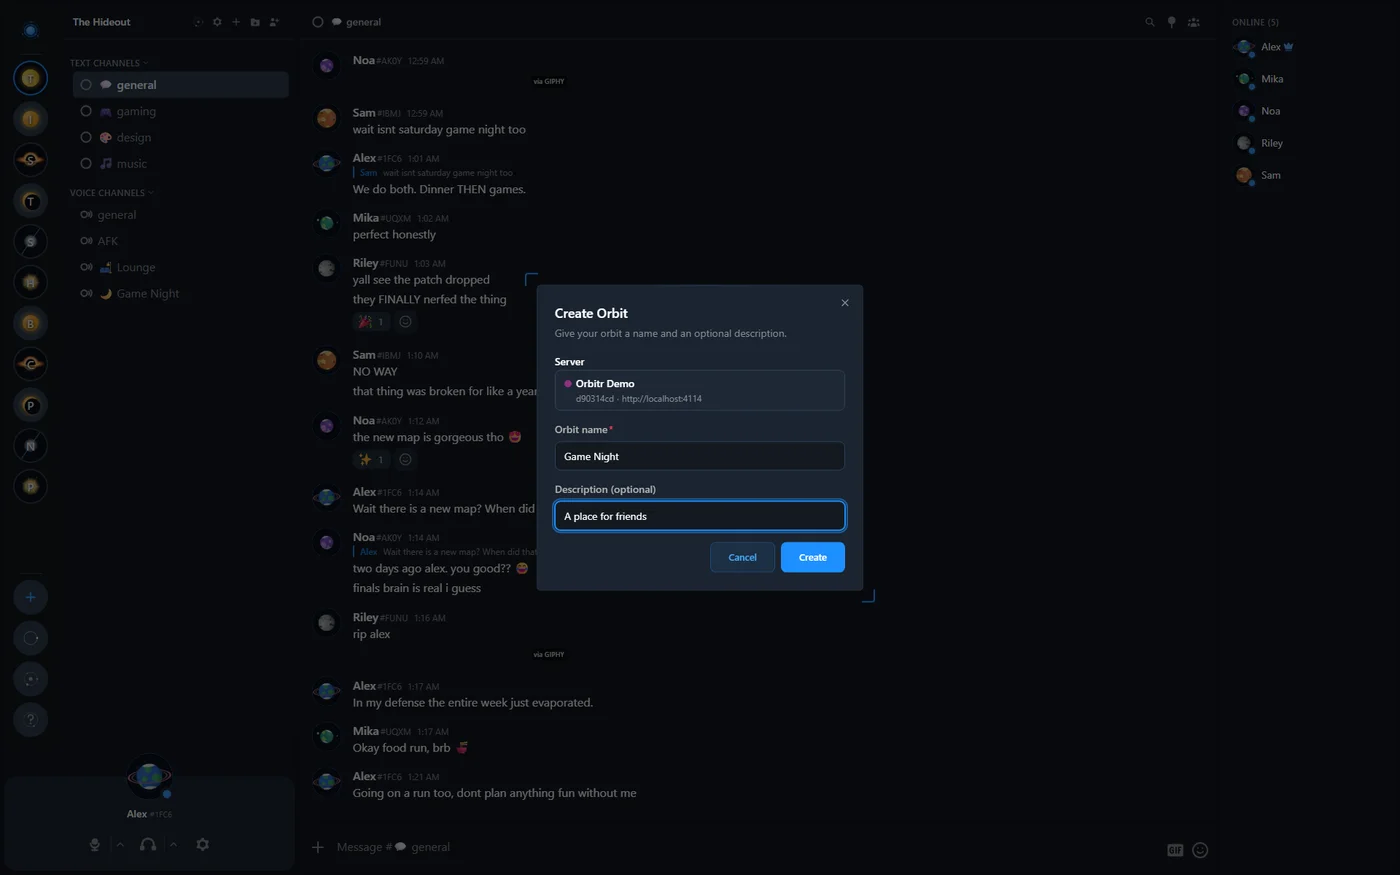
In the Orbitr app, click Create Orbit (the + in the orbit rail on the left), pick your server, give the orbit a name, and create it. You’ll land in your new orbit’s first channel.
Invite Friends
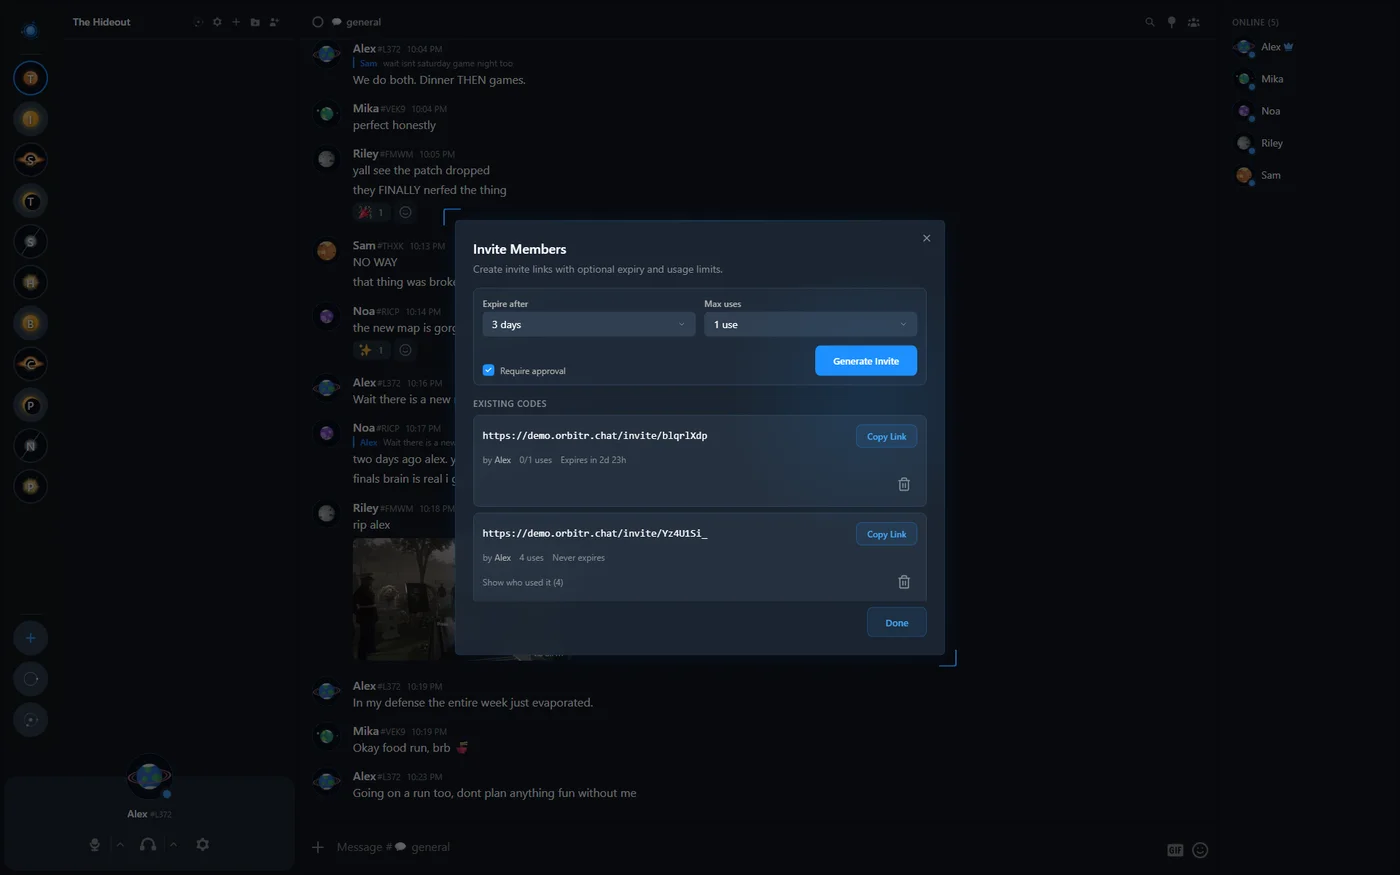
Open your orbit and create an invite link: right-click the orbit and choose Invite, or open Orbit Settings → Invites. Copy the link and send it to your friends.
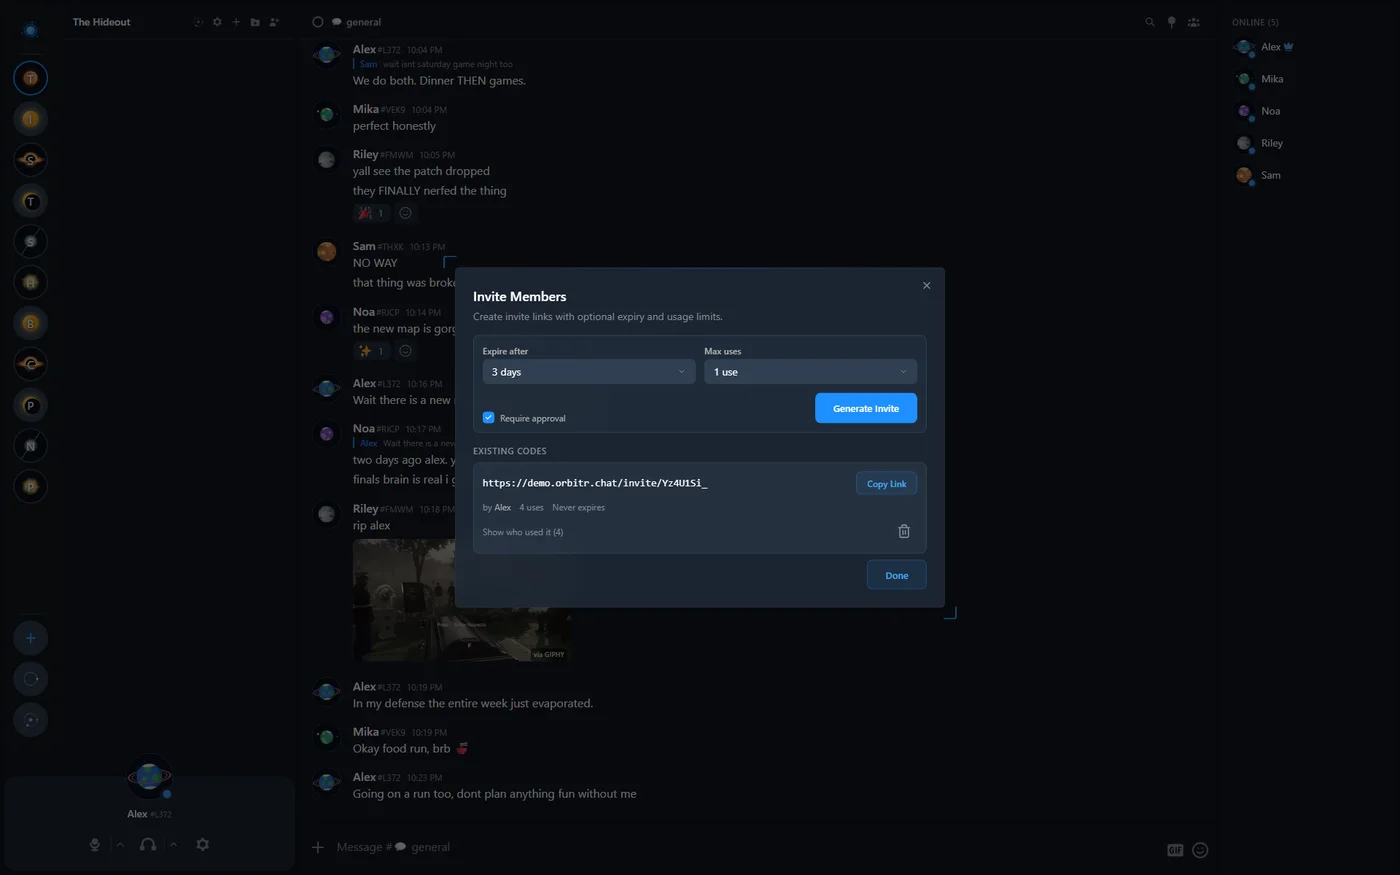
The invite link already includes your server’s address, so there’s nothing else to share. To join, your friends open the Orbitr app, click Join Orbit (bottom of the orbit rail), paste the link, and they’re in.
Next Steps
That’s it. You’ve got your own server, your first orbit, and friends joining you in it. Orbitr automatically tries to make itself reachable from outside your home network via UPnP. Open the Server App under Settings → Network to see your connectivity status and the best address to share with friends.
If friends can’t connect yet, or you want a permanent address like chat.yourname.com, follow the
Custom Domain guide.
What's next?
Join a ServerOrbitr PulsarOptional
Optional cloud identity backup and sync, so your identity follows you across devices.